Tuesday, November 10, 2015

Finally a solid A!

Some of you already know this, many of you may not, but I've been very VERY slowly working on a Certificate of Fashion Design online. This involves lots of drawing, something that I thought I was pretty decent at. Until I took this course. My first real drawing assignment was figure drawing, a standing and seated pose. I'd post the pictures but they are a tad wonky... however... surely I think I did better than the 69% I was given! I'm sure I'm a bit out of practice, but for those of you who know me, 69% is not acceptable. In fact, I was the type of kid who cried if I got less than a 90%! Well, college did a good job of beating THAT out of me, however my cutoff was and still is still an 80%. Needless to say I was a tad disillusioned by this unfortunate 69%.


The second assignment I did a bit better. We had to design two outfits for women and two for men. Just line drawings, no color. I got an 80%, which is technically ok with me, and I got some really nice comments. So considering the previous assignment I was pretty happy!


In the following module, we had to learn about different body types and how clothing can be used to flatter and alter the appearance of your natural shape. Then we had to design an outfit to flatter each of the four basic body types, and write a paragraph about how the outfit flatters that shape. I was a little worried about this project, but I'm happy to say I nailed it! I got a 90%, which is great in my book, especially for this course! I got some very nice comments too! So here is a little mini lesson on how to flatter the four basic body types:


The Rectangle

The  rectangle body shape is characterized by very little difference between the width of the shoulders, waist, and hips. The goal of dressing this body type is to create the illusion of an hourglass figure by making the waist appear smaller and hips/shoulders appear wider. The outfit above has a wide neckline and bloused bodice which makes the shoulders appear broader and bust appear larger. The cinched waistline makes the waist appear smaller and by ending the shirt along the hipline, the hips appear fuller. Soft touches like the floral butterfly fabric, scalloped hems, jewelry, and bright heeled shoes add a sense of femininity to this boyish figure. 


The Pear

The pear body shape is characterized by narrow shoulders, generally smaller bust, narrow  waist and large hips. The goal of dressing this body type is to play down the emphasis on the lower body and add balance to the upper body. The outfit above has a structured jacket in a light color, making the upper body appear fuller and shoulders broader. Details like front pockets, a strong collar, and large buttons keep the eyes interested and focused upwards. Ending the jacket at the waistline emphasizes the small waist. Straight-leg pants give balance to a larger bottom, and the dark pinstripe fabric makes the bottom appear smaller and legs appear longer. Simple heeled shoes also help elongate the legs.


The Inverted Triangle

The inverted triangle body shape is characterized by broad shoulders, generally larger bust, and narrow waist and hips. The goal of dressing this body type is to play down the emphasis on the larger upper body and add balance to the lower body. The outfit above has a simple fitted top in a darker color which makes the upper body appear smaller. A scooped neckline is also more flattering to a larger bust. The flared skirt in a lighter floral pattern draws the eye to the lower body and makes the hips appear fuller. Details like pockets, topstitching, and a large scalloped hem keep the eyes focused downward. Adding an unexpected pair of matching cowboy boots keeps the look casual & fun, and shows off the great legs usually associated with this body type.


The Hourglass

The hourglass body shape is considered ideal and is characterized by balanced shoulders and hips and a small defined waist. The goal of dressing this body type is to simply accentuate the natural shape. However, this shape can easily lean towards a pear or inverted triangle if too much focus is placed on one part of the body. The outfit to the right has a fitted top in a soft wave pattern that accentuates the natural curve of the body. The draped neckline places a touch of emphasis on the bust/shoulders while ending the hem above the widest part of the hips keeps the hips from looking too bulky. The boot-cut pant leg balances the wider hips. Heeled shoes in a matching color make the legs appear longer and keeps the eyes from focusing on only one area of the body.


Thursday, September 24, 2015

Honoring Ñaña through fabric design

So a few weeks ago I posted some pictures of a few hand embroidered heirlooms I inherited from my great-grandmother.  I have been trying to think of a way to honor her memory and give more people the opportunity to enjoy her beautiful handwork. Donating the items to a museum was one option, and I'll probably pursue that further eventually. But then in dawned on me... fabric design!

I've already been toying with the idea of trying to design fabric. Actually, it all started with my oldest little brother who is a really talented graffiti artist. He makes these little robots that I absolutely love! I've been nagging him (as any responsible big sister would do) to get his designs up on Spoonflower. I've even offered to digitize his sketches and figure out all the repeats for him! I'm hoping we are still going to pursue that path eventually, but he's taking the LSAT in October and will be a brand new father by Halloween, so right now I know his time is pretty limited. And he's only going to get busier!

So I've had fabric design on the brain for a while. But last week it hit me... Why don't I just make Ñaña's embroidery into fabric? Why didn't I come up with this sooner? So for the last week I've been playing around and trying to teach myself Adobe Illustrator. Did you know you can get it for $20/month on the cloud instead of however many hundreds of dollars it costs to buy it outright? For a program like illustrator that's a phenomenal deal, and you get a 30-day free trial. After using this program for a week I'd say the $20/month is totally worth it. Such a great program! But enough gushing about AI. Here is a screen shot of the dress motifs after tracing a photograph using AI (with the inspiration dress)


Since gradients in color are difficult to screenprint I just went with solid forms. I think it looks a bit cleaner and more modern. Then I took just the large blue/yellow flower, and his little blue/yellow friend, and tried my hand at making a tossed design with a 12" repeat. I came up with two options, one with the flowers close together, 


and one with the flowers farther apart.


Bear in mind the large flowers are 2.5" tall so it's a pretty big motif. The repeat is 12" by 12".... can you find it? 

So now I'd like to get your input. Which do you like better, the close version or the spread out version? Maybe you don't like either? I'd love to hear what you think in the comments below! In the meantime I'm off to make another pattern with some of the other motifs!

Tuesday, September 15, 2015

Free Headband Pattern & Tutorial!

I love headbands, especially fabric ones! Mostly because I have wild crazy hair and they are a great way to keep the fly-a-ways off my face. I could do ponytails of course, but those gave me headaches when my hair was long, and now it's too short for that. The thing that always drove me nuts about the fabric headbands is that there was always a gap in the back... much like any pants I try on (but that will be an entirely different blog post).

Since darts are the way we give our clothing shape and contour it around the curves of our bodies, one day I decided to add darts to the back of a basic headband pattern. First I tried just one, and it helped, but it wasn't good enough. Two was much better, and after a few iterations (where to place the darts, how wide to make the headbands, how quickly to taper down to the ends) I finally settled on a final design.

I've been teaching this pattern in my sewing summer camps and the girls really love to make them. They are probably an intermediate level project since accurate cutting and sewing are important for these to really fit well. But now you don't have to take my class since I have it all for you right here!
Click here for the free pattern download!

Contoured Reversible Headband

Materials
Two pieces of fabric at least 4” x 20” (two pieces make one headband) Scraps are fine, like the ones below. Make sure they are ironed nice and smooth.


Hair elastics

Coordinating thread
Cut out templates along solid lines, cutting out dart as you go.


Instructions
Fold fabric pieces right-sides together, matching short ends. Stack on top of each other, matching folded edges.

Place template on top of fabric with straight edge of template (where it says cut on fold) aligned on the fold.

Cut fabric with a rotary cutter but DO NOT CUT DART. Just cut straight across and continue following the template.

Using template as a guide, mark the darts on the wrong side of the fabric pieces with a fabric pencil. Be sure to mark two darts on each piece.

Fold each dart with right sides together, pinch at the point and match the “legs” of the dart. If you prefer you may pin in place and repeat for all darts, or fold & sew as you go.

Sew darts along the drawn lines, backstitch at each dart point.


Press all darts to the same side (either left or right).

Place pieces with right sides together, darts should snuggle up against eachother. If you prefer pin in place. In this picture I haven't aligned the long edge because I wanted to show you how the darts are supposed to snuggle. Don't they look cozy?

Sew along one edge with a ¼” seam allowance.

Turn and repeat for the other side. DO NOT SEW the super short ends, leave them open.

Turn the headband right-side out through either opening at the ends. I like to use this handy turning tool, sold at most quilt shops and chain fabric stores.

Just shove the tool inside the headband, grab the other end with the hook...

and carefully pull it back out while rolling the fabric over itself with moist fingers (I just lick my fingers but you can use a little water if you prefer). Once you get to hear you can remove the hook and just pull it right side out with your hands.

Now your headband will look puffy, like this

So you'll need to roll your seams to the very edge, it may help to wet your fingers a little when you do this. See how the seam is pushed out to the very edge in the second photo? You want to do that along each seam.


Press your headband flat. You’ll notice the headband wants to curve so pressing on a tailors ham is helpful. You should only see one fabric on each side, not both. If you can see both fabrics on one side you didn't roll your seams properly.

Fold one skinny end of your headband in ¼”

Then wrap the end around the hair elastic.

Sew across forward and back to secure the headband to the elastic.

Repeat on the other side, being careful not to twist your headband. It helps to lay it out like this...


The finished headband!

Put it on your head and wear it proudly! Don't forget the darts go to the back, the curved part goes to the front.

I'd love to see some pictures of your finished headbands! Feel free to post in the comments below or on my facebook page: www.facebook.com/simplyseamed

Friday, September 11, 2015

Hand Embroidered Cuban Family Heirlooms

I come from a family of makers. Seamstresses, knitters, artists, woodworkers, and all around handy-people. I have it on both sides of the family, but it seems especially strong on my mothers side, the Cuban side. My mother is a wonderful artist, when I was a little girl she would doodle the most amazing eyes! She could certainly draw other things too, but eyes were always her go-to sketch. My grandmother, Abuela, could sew very well and made my prom dresses. My great grandmother however, was in a class all her own. She was a seamstress by trade and did the most amazing hand embroidery I've ever seen! She passed away when I was 13, but I was lucky to have grown up with her for those few years, and she and Abuela were the ones that taught me to sew as a child. 

A few years ago Abuela, had to move from her apartment to an assisted living facility. In the process of moving and paring down her belongings I was very fortunate to inherit some amazing heirlooms (at least in my book)! Behold the treasure box of sewing goodies:


I remember this tape measure, the thimble, even the nail file... though I don't understand why it's in her sewing box. I'm pretty sure that's a rug hooking tool up there too, crochet hooks, and of course snips. But this is the boring stuff that only I, and perhaps my cousin Angie (named after my seamstress great-grandmother), would find interesting. The really good stuff was an assortment of clothing and a sampler hand embroidered by my great-grandmother!


However, the mark of good hand embroidery is when the back looks almost as good as the front.


Both my mom and aunt wore this dress as girls, I may have too. All made by hand, possibly an original pattern too.


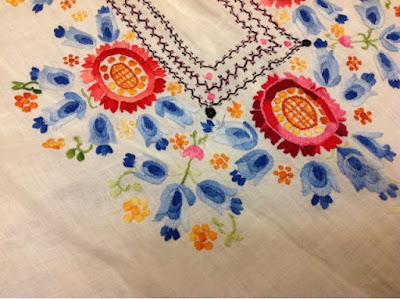
A close up of the floral motif.


And the inside of the hem


The embroidery on this one has seen better days. I'm sure it was worn by several members of my family.


This one is my favorite. I actually remember wearing this in high school. We have pictures of my mom wearing it too. It's quite threadbare at this point. 


I love the details on the sleeves. I miss wearing this shirt, but if I did now it would probably disintegrate.


Eventually I would like to donate these items to a textile museum or history museum! Or do something else that would properly honor the beauty and history of these garments. They are too threadbare to wear anymore and it just doesn't seem right to leave these items in a box where hardly anyone will get to see them. Actually, if anyone has any ideas as to what I can do with these, how I can best honor my great-grandmothers memory, I'd love to hear them in the comments!